macOS app · monitor brightness
The right light,
on the right screen.
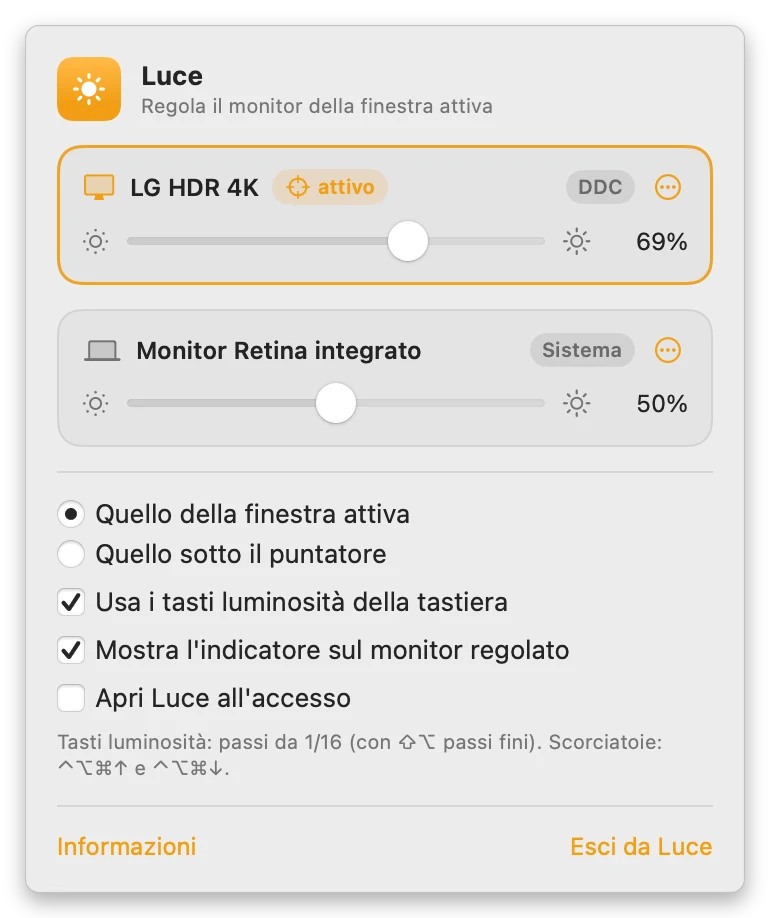
Luce sets the brightness of the monitor you are working on: click a window on the screen above, press the brightness keys and that one changes, not the laptop. On external monitors it changes the real backlight, like the buttons under the bezel, through DDC.

one icon in the menu bar, one slider per monitor.
What it looks like
Why I wrote it
I work with a laptop and an external monitor above it. The brightness keys only change the laptop screen, and for the monitor you have to hunt for the buttons under the bezel. The apps that solve this do a hundred things; I needed one: adjust the monitor I am working on, with the keys I already use.
How it controls each monitor
System: the Mac's built-in display and Apple monitors (Studio Display, Pro Display XDR) are adjusted the way macOS does it. DDC: on external monitors Luce sends the monitor the same command as its own buttons, over the cable, and changes the real backlight. Software: if a monitor doesn't answer DDC, the ⋯ menu turns on software dimming, which darkens the picture.
Which monitor to adjust is decided by the active window; in the settings you can pick the monitor under the pointer instead.
The three things I'm proudest of
The right monitor
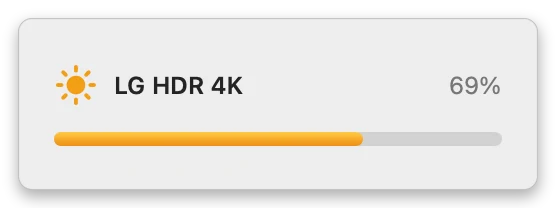
No menu to open: work in a window, press the brightness keys and that monitor changes. An indicator with the name and percentage appears on the monitor being adjusted.
Real brightness
On external monitors it doesn't dim the colours: it sets the backlight, like the monitor's own buttons. Writes are queued, so holding the key down stays smooth.
It does one thing
One icon in the menu bar, that's it. The ⌃⌥⌘↑ and ⌃⌥⌘↓ shortcuts work even without permissions; with ⇧⌥ the keys take finer steps.
Specs and requirements
- version 1.0
- requires macOS 13 Ventura or later
- processor Apple Silicon (M1 and later)
- monitors built-in, Apple, external with DDC/CI
- language Italian
- price €9.99, once
A few limits, up front
- DDC works on Macs with Apple Silicon; on Intel Macs only software dimming is available.
- Some connections don't carry DDC: the built-in HDMI port of some Macs, many DisplayLink adapters and docks, monitors with DDC/CI turned off in their menu. There, use software dimming.
- Using the keyboard's brightness keys needs the Accessibility permission. The arrow shortcuts don't.
- The interface is Italian only for now.
How to install
Download the .dmg
Click "Download": pay with PayPal and the Luce-1.0.dmg download starts on its own.
Drag it into Applications
Open the .dmg file: the window contains Luce, a shortcut to Applications and a picture with the next step's instructions. Drag the Luce icon onto Applications.
If macOS says it "can't be verified"
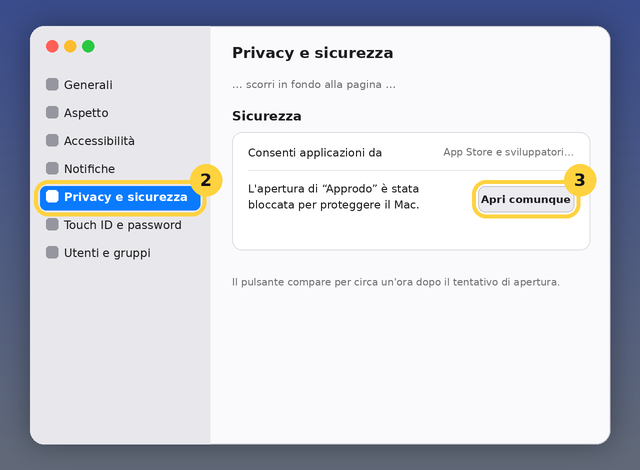
On the first double-click macOS warns that it can't verify the app: click Done, then go to System Settings › Privacy & Security and at the bottom click Open Anyway. You only do it once. The step-by-step guide with screenshots is here.
The permissions it asks for
For the brightness keys: Accessibility (System Settings › Privacy & Security › Accessibility, turn on Luce). Luce asks on first launch. If an external monitor doesn't change, check that DDC/CI is on in its menu.
License
€9.99 once, no subscription and no sign-up. The license covers personal and professional use on your Macs. It is not open source. I only ask you not to redistribute the file elsewhere: link this page, so whoever installs it always gets the current version.
If something doesn't work, write to me.